Grill with GRIPmitt: Advanced Techniques for BBQ Enthusiasts
Have you mastered the basics of grilling and you are a pro in grilling burgers, hot dogs and steaks? It’s a perfect time to take your grilling skills to the next level with these advanced techniques and tips. Fire up your grill, prepare all the essentials including GRIPmitt and Get a Grip on Grilling!
1. Smoking on the grill
You don’t have to necessarily have a special smoker grill to be able to enjoy the delicious taste of smoky meat. Try to smoke on your gas grill! You’ll only need some wood chips and a smoker box. The smoker box is sometimes a part of the gas grill, if not you can either buy it separately or improvise and make it at home using an aluminum foil and foil pan. If you don’t do this, they are likely to light on fire and won’t give you the smoke.

Start with preheating your grill at high temperature for about 15 minutes. Some grill masters recommend soaking the wooden chips in water for about 30 minutes whereas others are convinced that is not necessary. So, you might want to experiment a little bit and try both approaches to see which brings you better results! When your grill is preheated, add wood chips to your smoker box. If you don’t have one, simply place the chips in a foil pan, cover it with aluminum foil, and poke some holes into the foil to allow the smoke to escape. Then simply using GRIPmitt, add the food and start smoking. Close the grill lid as soon as possible so the smoke stays there. The smoke will accumulate closer to the smoker so place the food close to it to allow the smoke flavor to absorb. Are you asking which wooden chips to use and how much you need? Always check your recipe first but in general, poultry pairs well with sweet and fruity flavors whereas intense and savory-flavored wood chips are more suited for pork and beef. The amount obviously depends on the smoking time but in general, a handful of wooden chips should be enough for 1 hour of smoking. Again here is your room for experimenting!
2. Plank Grilling
Another way to infuse your food with unique flavors is plank grilling, also known as planking. It is a method in which the food is placed on the wooden board in indirect heat. Your food will get a nice deep, wood-smoked flavor similar to the method with wooden chips.

The most common wood planks used for grilling are usually cedar, hickory, alder, maple and cherry plank. Even here it pays off to use the flavor that complements your food – for example, cedar is great for grilling fish, and hickory might be a good choice for grilling soft cheese such as brie or camembert. Once you choose a plank you want to use, it is very easy. Soak it in water for about 30 minutes to an hour (again you can skip this step). Preheat your grill and then using GRIPmitt place your well-seasoned food on the plank and make sure the plank with food is on the indirect heat. Usually, planking takes a little bit more time than grilling directly on the grates so be sure to check on the food before serving it.
3. Reverse Searing
Reverse searing is another technique you can try on your grill to upgrade your BBQ game. It is usually used for thicker cuts of meat like steaks (ribeye, T-bone, fillet mignon), roast, prime ribs and thick pork chops and involves two main steps – slow cooking and searing. This method will ensure that your meat is cooked evenly throughout. Slow cooking will retain more moisture so the meat will be juicier and thanks to the searing at the end, the meat will have a perfect crust without overcooking inside.

First, season your meat and let it sit on the counter until it comes up to room temperature. Then preheat your grill for the slow cooking which is the first phase of reverse searing. You want to get your grill up to 200 – 250 °F. and then, place your steak on the grill. For gas grilling, you want to light only one side of the grill burners and cook the meat away from the heat on the other side. On the charcoal grill, you want to put the charcoal on one side and cook the meat on the cooler part of the grill. Close the lid and let the meat cook.
Prepare your meat thermometer and use it to monitor the internal temperature of the meat. Cook until the meat is about 5 °F under the final desired internal temperature (for medium rare steaks, it’s around 125°F at this point). Once it reaches the required internal temperature use a GRIPmitt to remove it from the grill and let it rest for about 5–10 minutes. In the meantime, preheat the grill to high heat and then place the meat over the direct heat. Sear each side for about 1–2 minutes until it has a nice brown crust. Use GRIPmitt to turn the meat and remove it from the grill to avoid piercing it and letting juice escape. After removing it from the grill, let it rest for another few minutes. And then your perfect piece of meat is ready to be served!
4. Rotisserie Grilling
Using a rotisserie on your grill is a great way to cook the meat evenly and achieve a juicy, flavorful result whether you are grilling on the charcoal or on the gas grill. It’s a great method to grill larger items such as whole chicken, roast or legs of lamb. You’ll need a rotisserie kit for the grill that usually includes the spit, forks and the motor. Then you might need a drip pan and meat thermometer to check on the internal temperature. First start with seasoning your meat. If you are grilling poultry or a large roast, you might truss to ensure it stays secure on the spit. Then skewer the meat and ensure it is centered and balanced to avoid uneven cooking. Preheat the grill to medium heat, attach the spit to the motor and check if it rotates smoothly. The meat should rotate slowly and evenly. Use a meat thermometer to check regularly. Once the meat reaches the desired temperature, it is time to turn off the motor and remove the spit from the grill. Before carving, let the meat rest for about 10 minutes so it stays juicy.
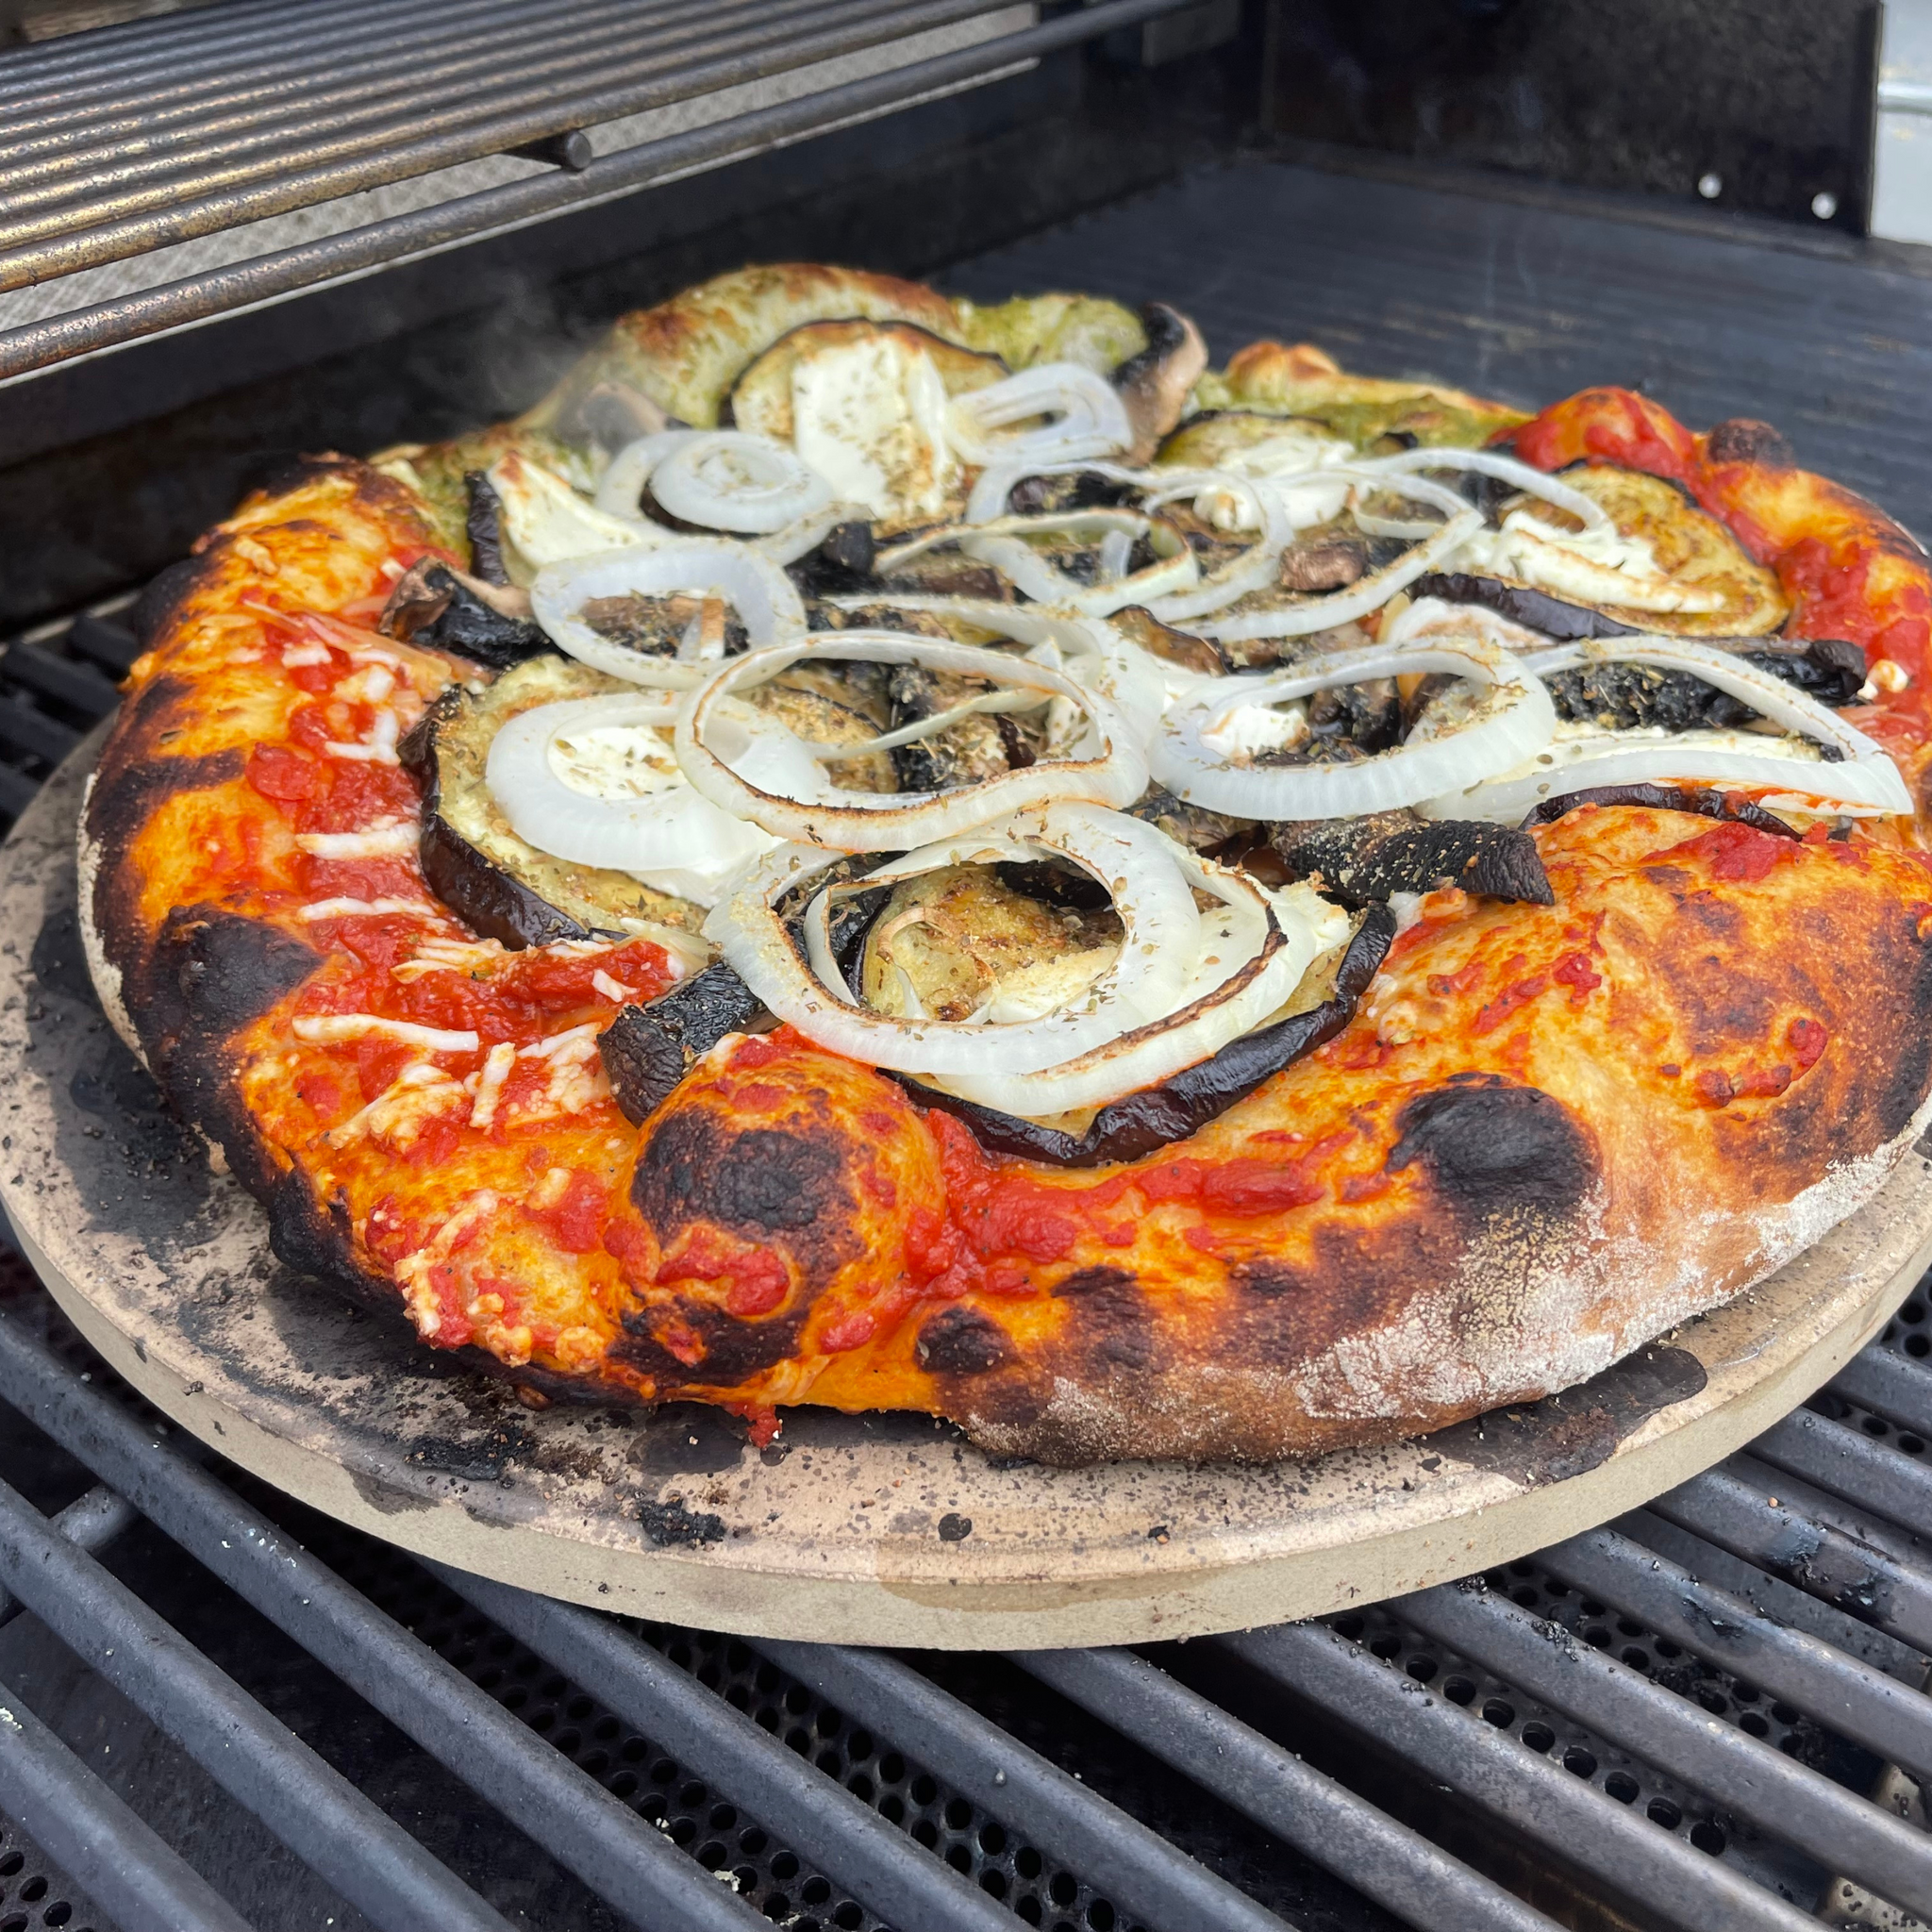
5. Grilling Pizza
Grilling pizza is a great way how to get a crispy crust with a smoky flavor. It is as easy as baking it in the oven. Prepare the pizza dough you prefer, both homemade and store-bought will work.

Preheat your grill to the highest temperature (700 F is best but a slightly lower temperature will work as well). Shape the dough, and place it on the grill. You can use a pizza grilling stone but it’s not necessary. Whether you use a stone or not make sure you turn the burners off or on low directly under the pizza. If you do not do this the bottom of the pizza dough will burn. In addition, if you use a stone make sure you place the stone in the grill before preheating so the stone heats up with the grill and allow the stone to cool down in the grill. This will help to minimize stone cracking. Once you shape your pizza dough and add the sauce and toppings, place the pizza on the grill using a pizza peel. Close the lid and let it grill until the crust is puffed, bubbly and has grill marks. It's important to pay attention while the pizza is cooking. Depending on your grill temperature the pizza could completely cook in about about 2 minutes. Make sure you rotate the pizza in quarter turn segments during the cooking process to allow the pizza to grill evenly. Using your pizza peel check the doneness of the bottom of the pizza dough. It should be a light tan color Remove from the grill and enjoy!
Also in News
The Most Common BBQ Mistakes and How to Avoid Them
BBQ Season is in full swing. Are you prepping a BBQ party or just grilling the dinner? GRIPmitt prepared a list of the seven most common mistakes and easy solutions to make the perfect grilled meal for your family and friends.

Milestones and Memories: A Look Back at 2024
As we enter the new year, we couldn't help but reflect on everything we achieved over the past 12 months. One of the highlights of WOW GEAR's journey? The successful launch of our new WOW CUP products. From months of careful planning to seeing our customers' amazing responses, it’s been a rewarding experience that has set the tone for even greater things to come in 2025.